In addition to workouts within a program, Perch also allows you to create specific, stand-alone workouts. We recommend creating workouts within a program so that you can utilize all of the features of Perch Plan. However, if you have the need for a quick, one-session training program, our stand-alone workout builder will do the trick.
Creating a stand-alone workout
1. From app.perch.fit, select PLAN --> Library

2. Once in your PLAN library, select CREATE NEW --> Workout

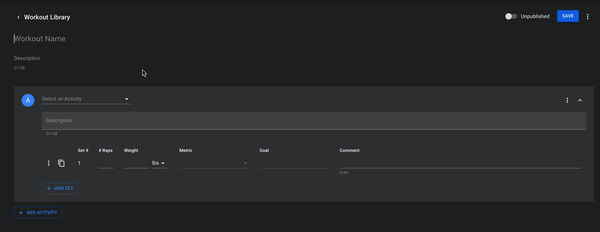
3. Name your workout and provide a description.
FAQ: How do descriptions and comments appear on the tablet?

4. Select your exercises, set volumes and intensities, and add any comments and goals, whether they're custom or pre-assigned.
You can add new sets from scratch with the +Add Set button, or copy sets you want to duplicate with the double page button.
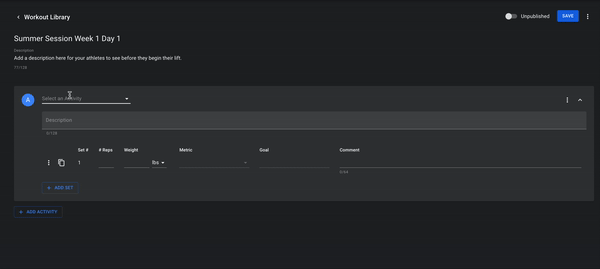
To add more exercises, select the +Add Activity button, and a new exercise section will appear. These will be linear in their header title (the first exercise will be A, the second will be B, the third will be C, etc.).
-gif.gif?width=600&height=312&name=ScreenRecording2024-01-30at10-42-36AM-ezgif-com-video-to-gif-converter%20(1)-gif.gif)
Workouts can be set in any order - you have the ability to move things up or down in order, depending on where you'd like them to sit by selecting the 3 dots in the top right of the exercise's box. In this menu you can also delete or duplicate exercises from your plan.
Publish A Workout
To view on the tablet, the workout must be published and saved. Switch the Published bar over to the right, where it will turn green, before you save.
If you are not ready for athletes to view the workout, keep the workout unpublished.
Once saved, you'll be able to see your plan in the Workout Library, where you can publish or unpublish any plan as well as deactivate any plan in order to keep the list as clean as possible.

Tip: Duplicate for easy workout creation! If you only make subtle changes week to week, you can "duplicate" any workout make your edits. You will able to see when each plan was created and last modified, and you can sort by any of the available headers in the workout library.

Visit our PLAN tutorial overview to view instructions on assig
Once your plans have been created and published, you're ready to get on the weight room floor and lift! See our user guide on using Perch PLAN on your tablet app here.
Finding a stand-alone workout
Athletes can search for a stand-alone workout on the tablet by switching "Program" to "workout" view from their home tab.

Archive a workout
If you'd like to remove a plan, select a workout from the library and choose "Delete Workout". This will move the workout from the "All" tab in the workout library to the "Archive" tab, where it can be recovered/restored as needed.
