Streamline your prescription and programming with Perch PLAN!
Using Perch PLAN involves two areas - creating and managing your plans on the web app, and using them on the weight room floor when going through your sessions. To see how to use the Perch PLAN on the web app, see our user guide here.
Once the plans have been saved and published, you're ready to go on the weight room floor! Please make sure that both your camera and tablet apps are up to date on their software versions.
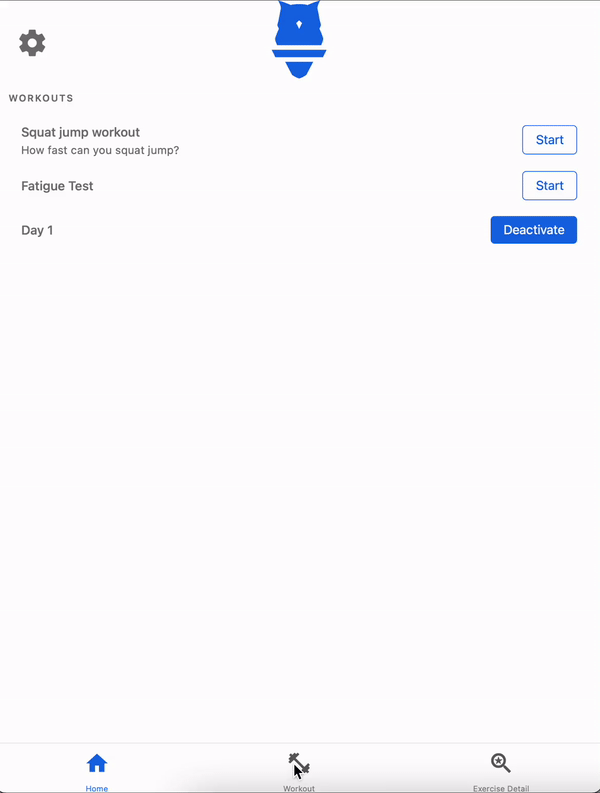
To see the plans available to you that have been activated, click on the Home tab in the bottom left hand corner of your Perch app. Here you'll be able to see a list of the active plans you have available. To see a preview of what's in the plan, click on its title, and click on the X in the top left hand corner of the screen to return to the list. Once you know which plan you'd like to select, click Start on the associated line.
***NOTE*** There can currently only be one active plan per tablet - two athletes cannot perform their own plans on the same tablet.
***NOTE*** In order to use Perch PLAN, at least one athlete must be logged in.
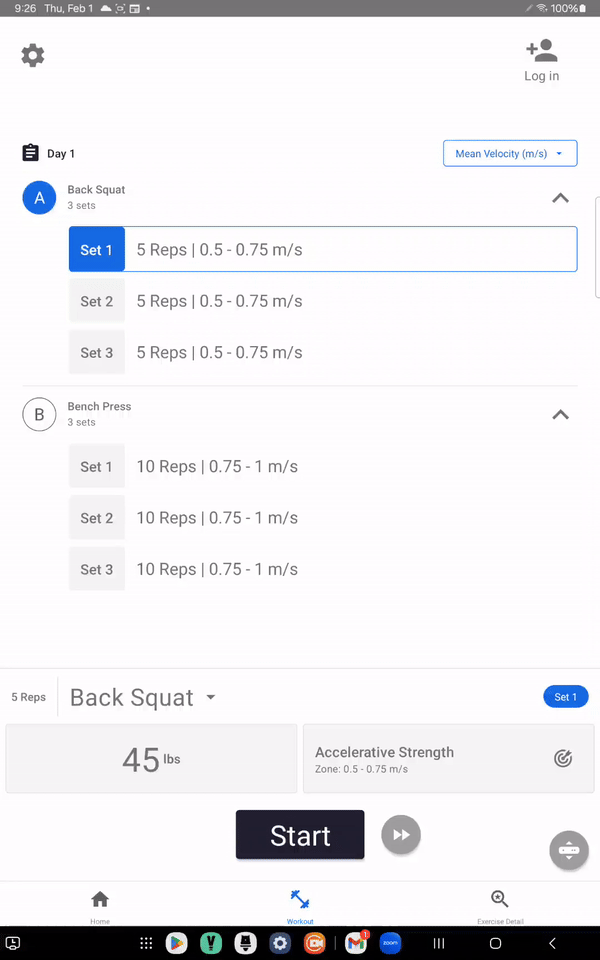
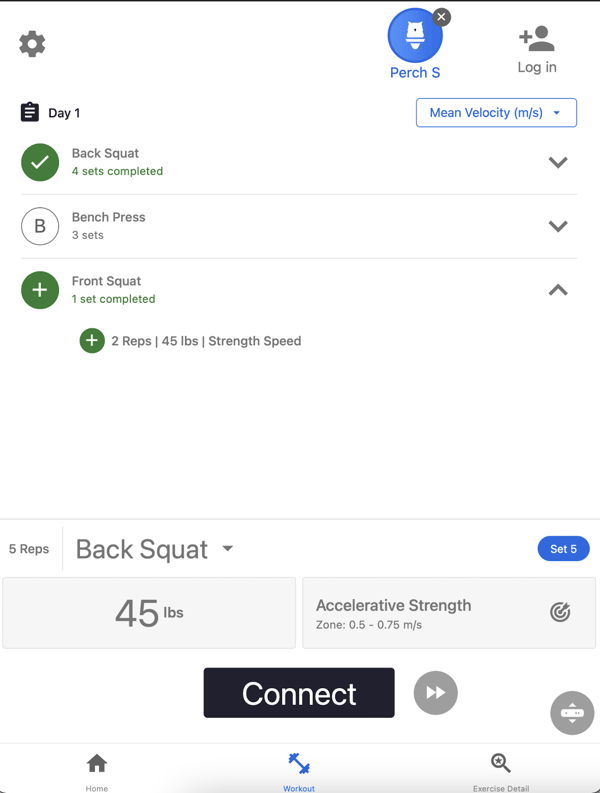
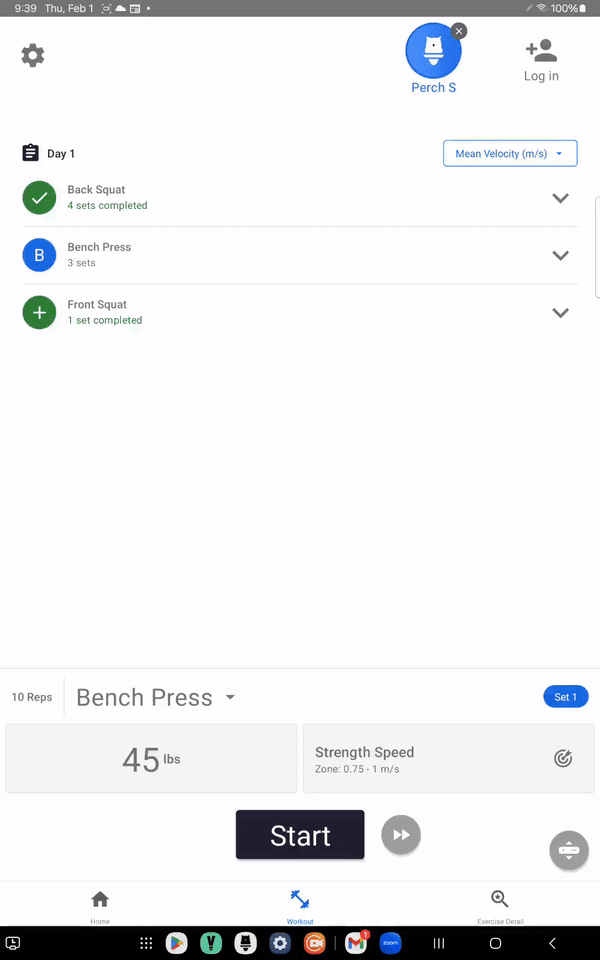
Once you've selected your plan, you can begin lifting as you normally would! The information related to the set will display on the bottom of the screen. You'll see what set number you're on for the selected exercise in blue to the right of the exercise.
Anything that you set up in your plan on the web will display on the tablet - rep and set schemes, intensity, goals, etc. Once you click on the set in question, the information will reflect what you designated in your plan.
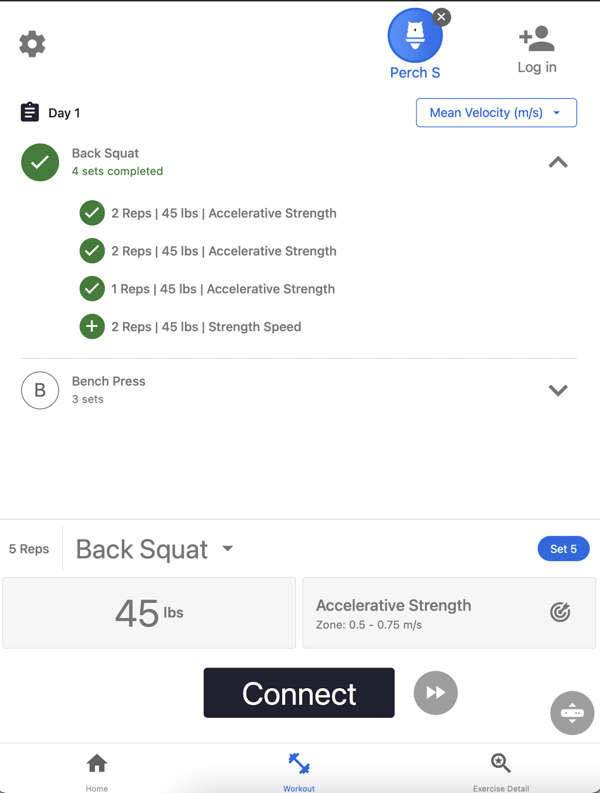
As you complete your sets, instead of seeing tiles, you'll see rows with summary information with a check mark next to them to indicate that they've been completed. Click on the row to open the set summary screen as you normally would by clicking on a tile.
Any sets that you complete of a prescribed exercise on top of the amount of sets assigned will display with a + inside of that exercise's section instead of a check mark.
To collapse or expand any of the exercise sections, select the arrow on the right hand side of the screen associated with it.
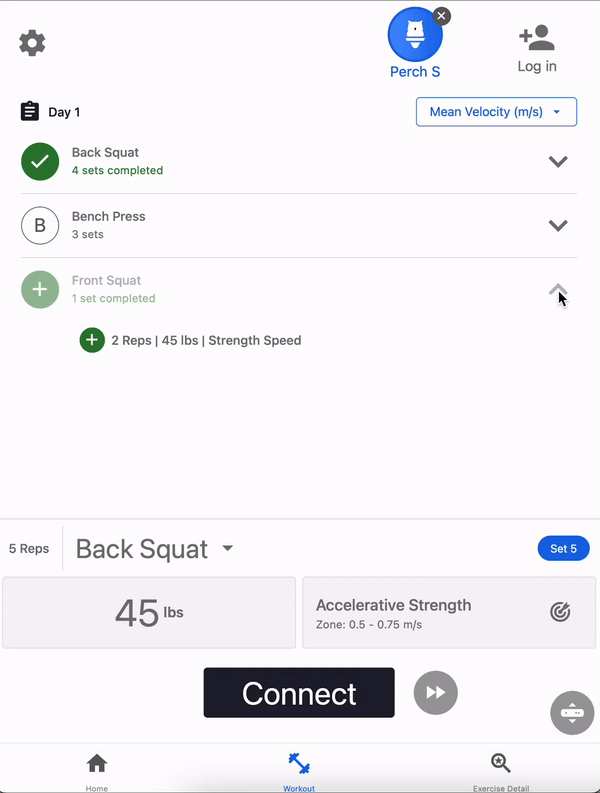
You have flexibility to deviate from the selected plan if need - any of the prescribed values can be adjusted on the floor! That includes weight, exercise, goal, etc. You won't be able to change the plan itself on the app, though, so if you change exercises in the plan, the prescribed ones will still display, and any sets that you complete of an exercise that was not prescribed in the plan will display in its own section with a + sign next to it.
There is a link between sets and users, meaning that if things need to be reassigned to different athletes or the order of sets needs to be changed, you can assign them properly by clicking on the title of the plan in the top left hand corner of the screen, which will take you to the workout summary page. Once there, any unassigned sets can be properly assigned or unassigned by selecting the Edit button in the bottom right hand corner of the page.
Once you've completed your plan, you can log out your athletes as you normally would by clicking the X in the top right hand corner of their user icon - since Perch is all cloud based, the information will send to the web automatically (as long as the tablet is connected to wifi), no manual saving necessary!
To deactivate a plan and get back into the standard recording mode, or to activate a different plan, go back into the Home tab and select Deactivate in blue. You can get back into the main landing page by selecting the middle Workout tab, or by starting a new plan.
Keep in mind that you can still use Perch TRAIN in its standard mode without any plan selected if you choose to!
If you're unable to see the plans or have any questions, please reach out to your Perch representative or email our support team at support@perch.fit.