In order to ensure that Perch is storing all information correctly, there are a couple of items that an athlete or coach will need to complete right before lifting. You will need to:
- Log In
- Choose How Much Weight You're Lifting
- Select What Exercise You're Performing
- Set Any Special Lift Settings (Not Required)
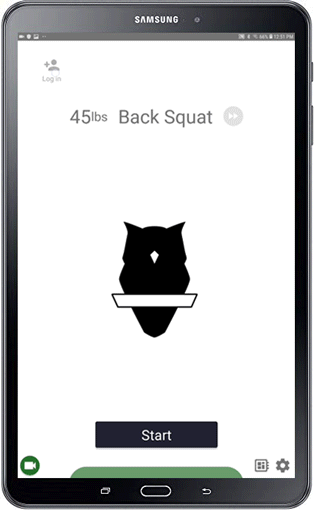
Athlete Login
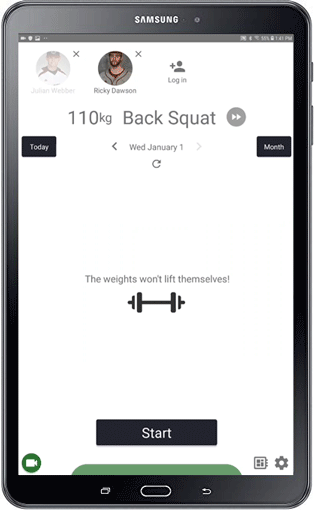
- Logging in Athletes is as easy as a tap of a button. Select the Athlete Login on the top left of your screen
- Select an individual athlete by scrolling to their name or typing their name in OR
- Select a group of athletes you have created in the Web App by toggling to groups and selecting the group in question
- Log an athlete out by selecting the X in the corner of their user circle
Weight Entry
NOTE: You can change the weight for a single athlete or apply the change to all athletes logged in. This can be done manually or as a percentage of their 1RM (input in the web application). Learn more at the bottom of this page, or in our Additional Lift Settings guide.
- Tap where it says "lbs" or "Kgs" button to switch between kgs and lbs
- Enter weight by either pressing the +/- buttons next to each plate (barbell math is hard!) or by manually entering the weight by clicking the number and a number pad will pop up - the barbell graphic will update automatically.
- Press the X to reset the weight to 45 lbs or 20 KG.
- Tap out of this screen to begin lifting
1 RMs and Percentage of 1 RM on the Tablet App:
- If your users have existing and saved 1 RMs in the web application, you will be able to prescribe load in the tablet app as a percentage of their 1 RM.
- Instead of entering the number to lift, you may enter a percentage of their 1 RM, you can do this for a single athlete or all of your logged in athletes. Click done once finished. The prescribed load will update on screen for each user.
- If athletes do not have a 1 RM entered for the selected lift, an alert on the tablet screen will inform you.
- You can select to change the weight or percentage 1RM for an individual athlete instead of all. This is done on the weight selection screen by selecting the specific athlete you would like to adjust the weight for. The tablet will default to all, to select one athlete, simply tap the profile picture of the individual, enter your selection, and click "Done"

Exercise Selection
NOTE: The camera angle is determined by the exercise. When you select an exercise, whatever exercise preset is saved for that exercise will be where the camera points. Learn more in our Exercise Presets article.
- Tap the exercise name to select your exercise, these are categorized by movement type
- Select your exercise
- If you choose a unilateral exercise, you will be given the option to choose - 1) Which limb you are using first and 2) if you are alternating limbs or not. We track which rep is associated with which limb. More on that here.
Special Lift Settings
NOTE: These settings are discussed in more depth in our Additional Lift Settings guide
- Auto-Mode -This is what you select to automatically rotate between athletes. Auto-Mode uses a timing threshold between reps to determine when a set automatically finishes and the next user is logged in. You can change the time threshold in the "settings" of the tablet app.
- Velocity Thresholds - You can set velocity range for each lift and choose whether or not to display them in real time. You may also choose to display fast and slow reps as different colors for increased visual feedback.
- Unilateral Exercises - When you select a unilateral exercise, we will provide you with two questions, 1) Which limb you are using first and 2) if you are alternating. With this information we can display and record which rep is associated with which limb.